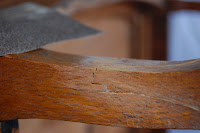
I recently purchased this oak washstand at an estate auction and while it is in basically good condition, it does need a few small repairs before I get to restyling it.
The first flaw I decided to tackle, and one I see very often, was a broken foot caused by stress from a caster wheel. The caster wheels on this chest were obviously not original as they are inappropriate for its size. I couple of bumps as you roll it around and "snap" goes the foot, which is exactly what happened here. At some point someone tried to glue it back and shove the caster right back in. Nope, not gonna work! It snapped again and as you can see by the picture below they gave up on actually fixing it and taped it instead! Brilliant fix in my opinion as long as "nobody touches the chest in Granny's Den"!
Well that sort of fix just won't do for me, so off I embarked to properly and permanently patch up an old washstand's boo boo!
Please keep in mind, this tutorial does not show a antique restoration quality repair. This is a permanent quality repair appropriate for painted furniture, which is my intended finish for this piece.
I began by sanding off all of the old glue with a coarse grit sandpaper. I also used a knife to gently scrape away the excessive blobs that were left behind from the last repair attempt. The idea is to expose as much of the raw wood as possible. Wood glue only works if it has clean raw wood to bond to.
After the sanding, I clamped the two pieces together to make sure it was still a good fit and that there was good contact between the two pieces of wood. Gaps will create a weaker bond that is likely to crack over time or under stress.
In order to create more wood contact and strengthen the bond further, we decided to fill the hole with an oak dowel.
The exact diameter of the old caster insert was 3/8 of an inch. However after all of the sanding and scraping away the diameter of the caster hole was now just a hair smaller. So my darling husband got out the drill bits and opened it up to exactly 3/8 of and inch.
We clamped the broken piece back in place and wiped away all the excess with a wet paper towel. This is very important. Glue drips are very hard to get rid of after they dry!
Next we applied glue to the dowel...
inserted it...
and cleaned up the excess.
Since I wasn't going to replace the casters, I figured we would go ahead and fill all of the holes.
Hubby opened them each up to exactly 3/8 of an inch.....
spreading glue....
dab some inside as well...
insert....
clean....
and voila! Now, I just let her set overnight.
The next morning I removed the clamps and cut all of the dowels flush.
There was a jagged edge where the wood had split. (I had a hard time getting a good picture of it, but you could really feel it when you ran your fingers over it.)
I sanded it down smooth with coarse grit paper and also sanded down the bottoms of each foot.
Next I filled any remaining cracks and crevices with wood filler. Be sure to press it in as you pull it out smooth.
After about an hour of drying, I sanded it all smooth with a fine sanding sponge.
All done and ready for paint!
This piece will be painted with Old Fashioned Milk Paint in "Slate". I am so excited to finally work with a milk paint product!
I hope this tutorial was helpful and will encourage you to not pass by that broken piece of furniture. Many pieces can be repaired with a bit of extra effort. The important thing, in my opinion, is to take the time and make the repair right. If it is done properly, then that old piece of furniture has many more years to come!


Wow that’s how we deliver the great prices you sees on our Vancouver concrete page. Vancouver concrete
ReplyDelete